
Grav のインストール方法から管理パネルを使った基本的な設定・使い方、 テーマのカスタマイズ方法までの連載です。
- Grav の FTP を使ったインストール方法
- Grav の管理パネルを使った基本的な設定・使い方
- Grav のデフォルトテーマ「Antimatter」の日本語化とカスタマイズ方法
- Grav で使える Markdown 記法
- Grav のテーマ編集でよく使う変数と Twig の解説
第4回目は Grav で使える Markdown 記法です。
なお、 これらの記事は一部 Grav learn (The MIT License © 2014 Grav) を基に翻訳・改変し、 使用しています。
Grav では一般的な Markdown に加え、 一部の GitHub Flavored Markdown に対応しています。 また、 Grav だけで使える特殊な記法もあります。 解説は Grav だけで使える記法 のみします。
見出し H1~H6
# h1 Heading
## h2 Heading
### h3 Heading
#### h4 Heading
##### h5 Heading
###### h6 Heading
水平線 hr
___
---
***
段落 p 改行 br
Lorem ipsum dolor sit amet, graecis denique ei vel, at duo primis mandamus. Et legere ocurreret pri, animal tacimates complectitur ad cum. Cu eum inermis inimicus efficiendi. Labore officiis his ex, soluta officiis concludaturque ei qui, vide sensibus vim ad.
Lorem ipsum dolor sit amet, graecis denique ei vel, at duo primis mandamus. Et legere ocurreret pri, animal tacimates complectitur ad cum. Cu eum inermis inimicus efficiendi. Labore officiis his ex, soluta officiis concludaturque ei qui, vide sensibus vim ad.
そのまま。行末にスペース2つで改行
太字 strong
**rendered as bold text**イタリック i
_rendered as italicized text_取り消し線 del
~~Strike through this text.~~引用 blockquote
> **Fusion Drive** combines a hard drive with a flash storage (solid-state drive) and presents it as a single logical volume with the space of both drives combined.> Donec massa lacus, ultricies a ullamcorper in, fermentum sed augue.
Nunc augue augue, aliquam non hendrerit ac, commodo vel nisi.
>> Sed adipiscing elit vitae augue consectetur a gravida nunc vehicula. Donec auctor
odio non est accumsan facilisis. Aliquam id turpis in dolor tincidunt mollis ac eu diam.順序のないリスト li
* valid bullet
- valid bullet
+ valid bullet
+ Lorem ipsum dolor sit amet
+ Consectetur adipiscing elit
+ Integer molestie lorem at massa
+ Facilisis in pretium nisl aliquet
+ Nulla volutpat aliquam velit
- Phasellus iaculis neque
- Purus sodales ultricies
- Vestibulum laoreet porttitor sem
- Ac tristique libero volutpat at
+ Faucibus porta lacus fringilla vel
+ Aenean sit amet erat nunc
+ Eget porttitor lorem順序のあるリスト ol
1. Lorem ipsum dolor sit amet
2. Consectetur adipiscing elit
3. Integer molestie lorem at massa
4. Facilisis in pretium nisl aliquet
5. Nulla volutpat aliquam velit
6. Faucibus porta lacus fringilla vel
7. Aenean sit amet erat nunc
8. Eget porttitor lorem
インラインコード code
In this example, `<section></section>` should be wrapped as **code**.インデントコード pre code
    // Some comments
    line 1 of code
    line 2 of code
    line 3 of code
ブロックコード pre code
```
Sample text here...
```
シンタックハイライト
``` js
grunt.initConfig({
  assemble: {
    options: {
      assets: 'docs/assets',
      data: 'src/data/*.{json,yml}',
      helpers: 'src/custom-helpers.js',
      partials: ['src/partials/**/*.{hbs,md}']
    },
    pages: {
      options: {
        layout: 'default.hbs'
      },
      files: {
        './': ['src/templates/pages/index.hbs']
      }
    }
  }
});
```
表 table
| Option | Description |
| ------ | ----------- |
| data   | path to data files to supply the data that will be passed into templates. |
| engine | engine to be used for processing templates. Handlebars is the default. |
| ext    | extension to be used for dest files. |
右寄せ
| Option | Description |
| ------:| -----------:|
| data   | path to data files to supply the data that will be passed into templates. |
| engine | engine to be used for processing templates. Handlebars is the default. |
| ext    | extension to be used for dest files. |
中央寄せ
| Option | Description |
|:------:|:-----------:|
| data   | path to data files to supply the data that will be passed into templates. |
| engine | engine to be used for processing templates. Handlebars is the default. |
| ext    | extension to be used for dest files. |
コメント <!-- -->
<!--
This is a comment
-->
リンク a
[Assemble](http://assemble.io)タイトル付き
[Upstage](https://github.com/upstage/ "Visit Upstage!")名前アンカー
# Table of Contents
  * [Chapter 1](#chapter-1)
  * [Chapter 2](#chapter-2)
  * [Chapter 3](#chapter-3)
## Chapter 1 <a id="chapter-1"></a>
Content for chapter one.
## Chapter 2 <a id="chapter-2"></a>
Content for chapter one.
## Chapter 3 <a id="chapter-3"></a>
Content for chapter one.Grav だけで使えるリンク
[link](../../sky)
[link](/01.blue/01.sky)
相対/絶対パス・数値プレフィックスあり/なし どちらでも大丈夫です。
属性
[Big Button](../some-page?class=button,big)[Unique Button](../some-page?id=important-button)[NoFollow Link](../some-page?rel=nofollow)[Link in new Tab](../some-page?target=_blank)[Combinations of Attributes](../some-page?class=button&rel=nofollow&target=_blank)class、 id、 rel、 target 属性が使えます。
画像リンク
Alt 付き
id 指定
![Alt text][id][id]: http://octodex.github.com/images/dojocat.jpg "The Dojocat"Grav だけで使える画像リンク

相対/絶対パス・数値プレフィックスあり/なし どちらでも大丈夫です。
属性
class id 属性が使えます。
メディア
Grav では多くのメディアファイルに対応しています。 また、 組み込み機能によってサムネイルなどを動的に生成できます。 生成されたファイルは自動的にキャッシュされ、 変更された時は最新のバージョンを使用できるシステムになっています。
Grav 対応メディアファイル
| メディアタイプ | ファイルタイプ |
|---|---|
| 画像 | jpg, jpeg, png |
| 音声 | mp3, wav, wma, ogg, m4a |
| アニメーション画像 | gif |
| ベクタ画像 | svg |
| 動画 | mp4, mov, m4v, swf |
| データ/情報 | txt, doc, html, pdf, zip, gz |
[title](url "alt"]{.classes}
 {.myclass}
システム設定で Markdown Extra を有効にする必要があります。
リンク

メディアファイルにリンクを付加します。
表示モード

| モード | 説明 |
|---|---|
| source | 実際の画像、動画、ファイルなどメディアの標準表示 |
| text | メディアのテキスト表示(title) |
| thumbnail | このメディアオブジェクトのサムネイル画像 |
Lightbox([幅、高さ])
FeatherLight プラグイン が必要です。
サムネイル

page と default が選択できます。
サムネイル画像の保存先は以下の場所になります。
- 同じフォルダ
[media-name].[media-extension].thumb.[thumb-extension]
- user フォルダ
user/images/media/thumb-[media-extension].[thumb-extension]
- system フォルダ
system/images/media/thumb-[media-extension].[thumb-extension]
page で 1 を使用し、 default で 2 または 3(2が優先)を使用します。
なお、 1 がある場合は display=thumbnail を付けなくても、 自動的にサムネイルが使用されます。
リサイズ(幅、高さ、[背景])
アスペクト比を維持して幅、高さでリサイズして、 指定サイズに足りない部分は指定がない場合 PNGなら透明、 JPEG なら白で背景が付加されます。
強制リサイズ(幅、高さ)
アスペクト比を無視して幅、高さでリサイズします。
切り取りリサイズ(幅、高さ)
アスペクト比を維持して幅、高さでリサイズします。
切り取り(X、Y、幅、高さ)
左上をX、Yとした位置で幅、高さで切り取ります
切り取りズーム幅、高さで

アスペクト比を維持して、指定した長辺方向でリサイズしてから短辺方法を切り取ります。
クオリティ

画質を 0~100 で設定します。 100が最高画質です。
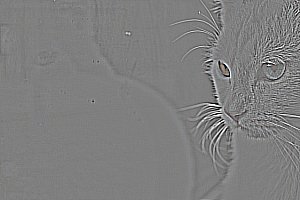
ネガポジ反転

画像の色を反転させます。
明るさ

輝度フィルタを -255~255 で設定します。 正数が明るく、 負数が暗くなります。
コントラスト
コントラストフィルタを -100~100 で設定します。 正数がコントラストを低下し、 負数が増加します。
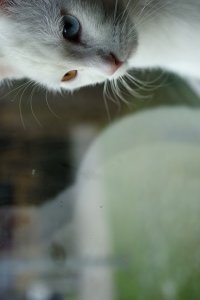
グレースケール
グレースケールフィルタを設定します。
エンボス
エンボス加工フィルタを設定します。
スムース

スムースフィルタを -10~10 で設定します。 正数がスムースになり、 負数がシャープになります。
シャープ

シャープ加工フィルタを設定します。
エッジ
エッジ加工フィルタを設定します。
彩色(赤、緑、青)
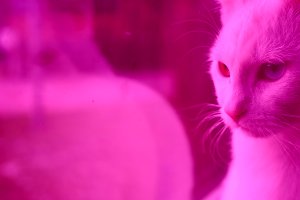
彩色フィルタを設定します。 赤、緑、青の値を -255~255 で調整します。
セピア
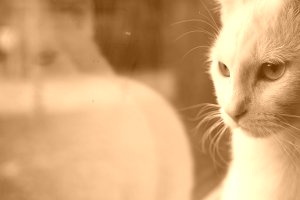
セピア加工フィルタを設定します。
回転(度)

画像を回転させます。 正数が反時計回り、 負数が時計回りです。
反転(垂直、水平)

画像を垂直、 水平に反転させます。 どちらか1つは true でなければなりません。
向き修正
Exif 情報にあわせて画像を回転させます。 Exif 情報がない場合はエラーになります。
組み合わせ
アニメーション・ベクタ画像・動画
リサイズ
アニメーション画像・ベクタ画像・動画は PHP でリサイズ処理できないので指定したサイズで表示しますが、 実際に変換はされていません。

音声

To Be a Master P. by Boom Boom Beckett / CC BY-NC 3.0
動画

Nature Time Lapse 2 by mockmoon2000 / CC BY 3.0
サムネイル風に動画をリンクする
[](Nature_Time_Lapse_2.mp4))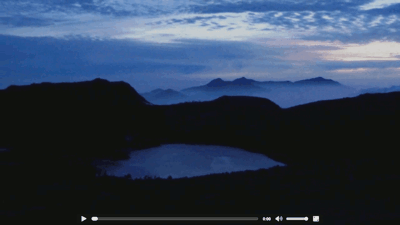 )
)
Nature Time Lapse 2 by mockmoon2000 / CC BY 3.0
Youtube でサムネイル付きのリンクも作れます。 サムネイル取得方法は Youtube動画からサムネイル画像を取得する方法が分かりやすかったです。
[](https://www.youtube.com/watch?v=2t87TWp1Nxg?target=_blank "Nature Time Lapse 2 -微速度撮影動画まとめ2- (HD 720p) - YouTube")
レスポンシブ画像
[image-name]@[density-ratio]x.[image-extension] を同じフォルダに用意します。
上記の場合 retina.jpg の他に retina@2x.jpg と retina@3x.jpg を置いてあります。
HTML5 の srcset を指定してくれているのですが、 詳しくはHTMLのsrcsetを使って画像をレスポンシブにRetina対応させてみよう が分かりやすかったです。
HTML は以下のように書きだされます。
<img alt="Retina Image" src="retina.jpg" srcset="retina.jpg 640w, retina@2x.jpg 1280w, retina@3x.jpg 1920w" sizes="100vw">sizes の指定できます。(Media Queries は まだ Markdown では対応していません)

次回、 Grav のテーマ編集でよく使う変数と Twig の解説に続きます。


